Shield Tool user guide#
The Shield tool is designed to work with the X4F103 Shield connected to a Nordic Semiconductor nRF52840DK development kit. The tool is written in Python and can easily be extended to do long-term logging or build more advanced demos.
Nordic nRF52840DK board setup#
To run the application, the Nordic nRF52840DK board has to be set up like described below.
Switch on the top right (SW6) in “DEFAULT” position
“nRF Power Source” switch (SW9) in “VDD” position.
Power switch on bottom left (SW8) in “ON” position.
Connect the X4F103 Shield to the Nordic board. The pin-out can be found in the product brief here: X4F103 Shield brief.
Connect the USB connector (J2) on the left side of the board to the host via a Micro-USB 2.0 cable.

Nordic nRF52840DK#
Get started#
Follow these steps to get the visualization application running.
Download the Shield Tool software folder and extract it to any location on a computer:
Make sure that Python 3.10 is installed and added to PATH.
Download instructions: Python 3.10 installation guide
On Windows only:
Install J-Link driver. There are 2 options:
Install J-Link Software and Documentation Pack. Install the driver by running
USBDriver\InsDriversapplication from J-Link installation folder, e.g.:"C:\Program Files\SEGGER\JLink_V794k\USBDriver\InsDrivers.exe"
Open the downloaded software folder in a terminal.
Install the required packages using the following command:
pip install -f ./wheels novelda_x4f103setNote
The recommended procedure when installing python packages is to use a virtual environment. How to create a virtual environment can be found here: Create a virtual environment (venv) in Python
Running the Shield Tool#
Start the application by running
x4f103setin the software folder in the terminal.
When starting the application from the terminal as described above, a menu of the available products is listed. The available ones are Occupancy and Proximity.
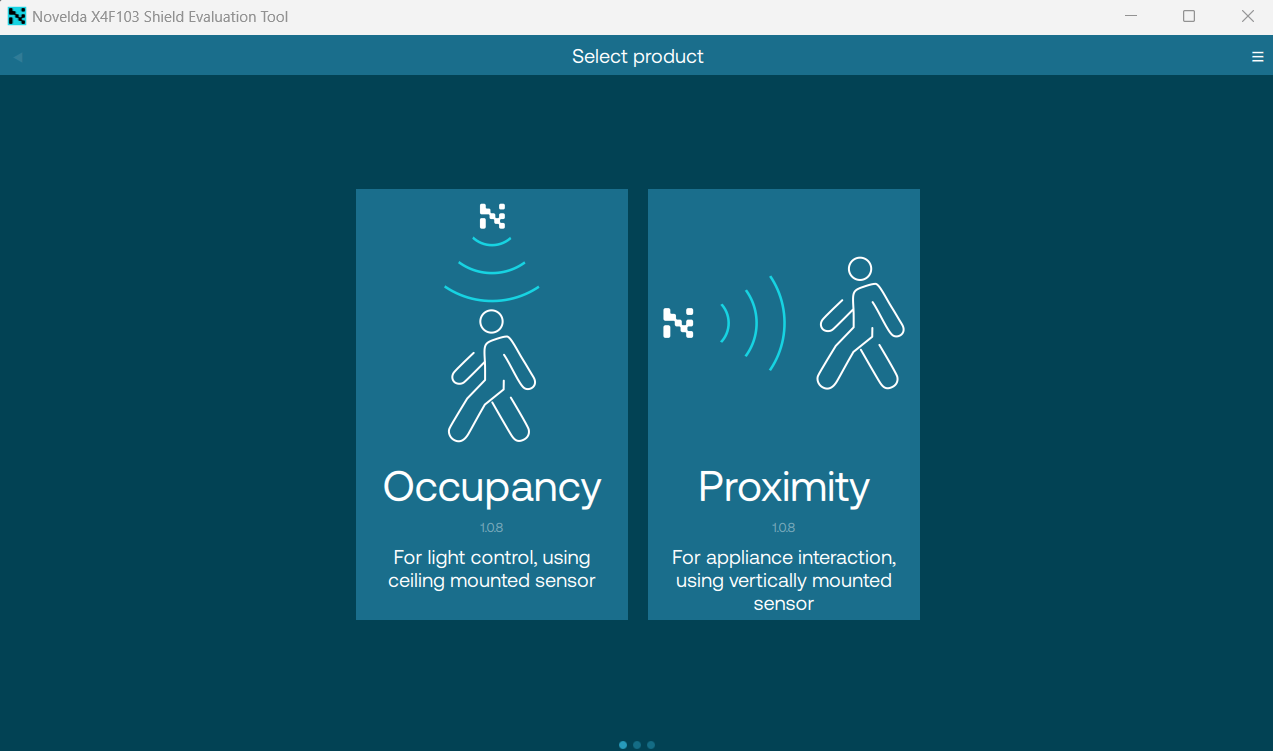
Select Product#
In the next window the user is asked to choose the range (cm) and sensitivity. The maximum distance at which the sensor will detect objects is determined by the chosen detection range. The available range options will vary between the products. The sensitivity level is a number between 1 and 5, where 5 is the most sensitive. Press START to run the Shield Tool after selecting settings.
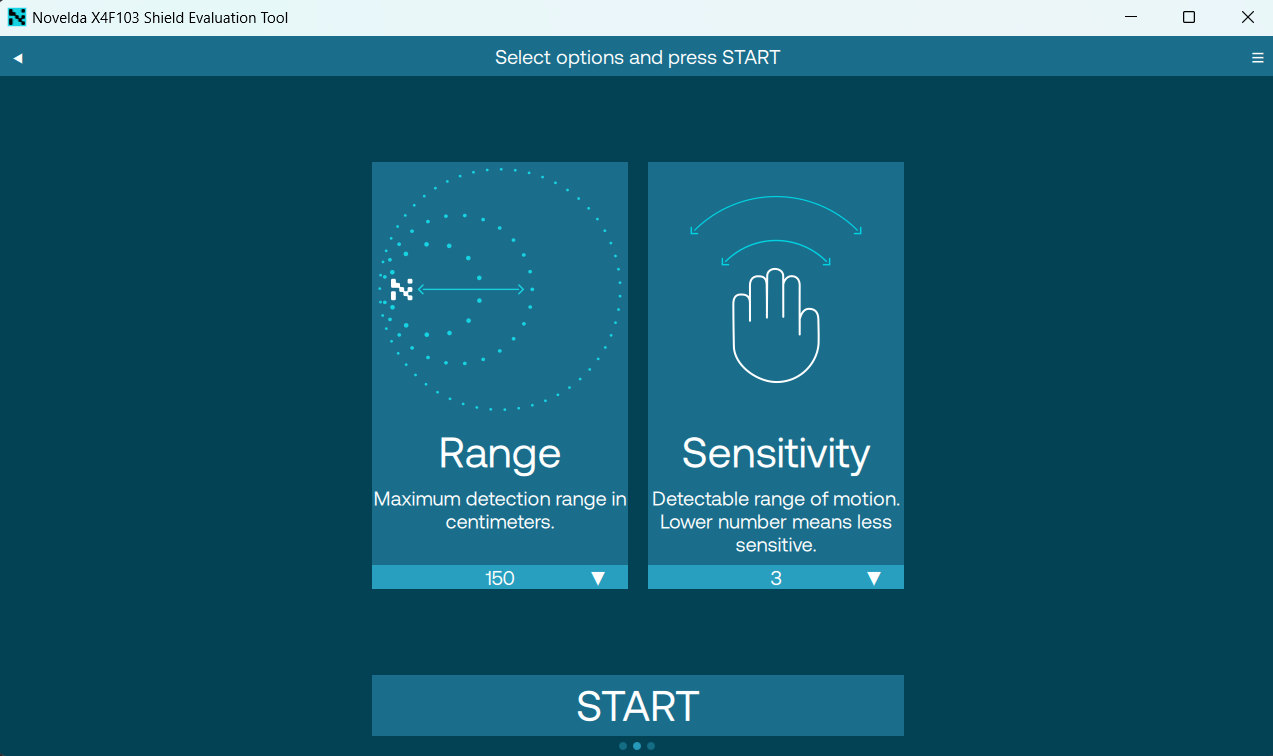
Select options#
After pressing START, it will take approximately 5-10 seconds before the application starts. In the application window, the user can select a presence timeout between 0 and 120 seconds. The default is 60 seconds. This means that the output will stay in presence for the selected timeout period after the last detection from the sensor. The plot shows the sensor state over time. When the sensor detects presence the state will stay in presence (green) for the detection and timeout period.
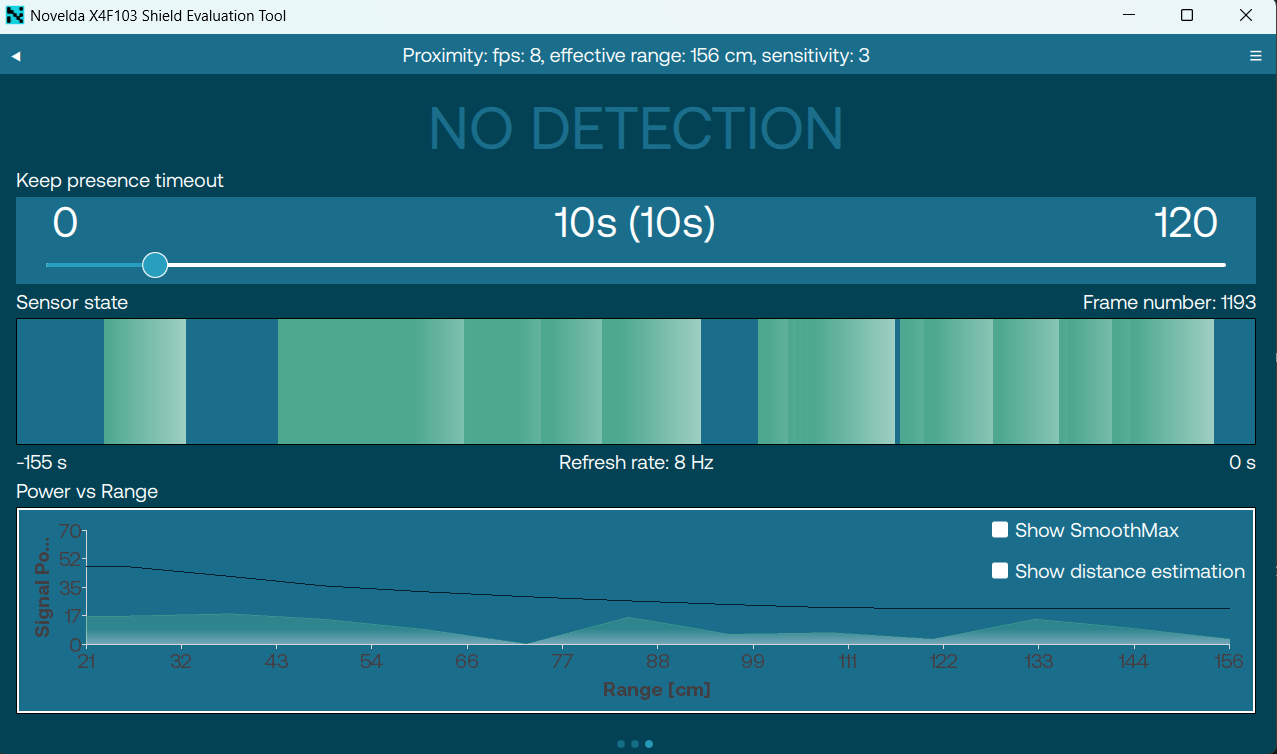
Application running#
To change the range and sensitivity, use the arrow in the top left corner to navigate back to the settings (or press ESC). After changing settings, press START to run the application again.