X4F103 SDK example user guide#
Download the X4F103 SDK from here:
Introduction#
The X4F103 SDK for Occupancy and Proximity includes example projects that can be built and flashed to a Nordic nRF52840DK board. This guide will describe a procedure using a Virtual Studio Code extension to build and flash the program. We recommended using this procedure when running the example projects.
To run the example on another MCU, refer to the “Porting” section in the X4F103 SDK user guide.
Installation procedure#
Install the X4F103 SDK for Occupancy or Proximity. The link to downloads are found on the top of this page.
Install VS Code: https://code.visualstudio.com/download
Install nRF Command Line Tools: https://www.nordicsemi.com/Products/Development-tools/nRF-Command-Line-Tools/Download
Install nRF Connect for Desktop: https://www.nordicsemi.com/Products/Development-tools/nRF-Connect-for-Desktop/Download
Open nRF Connect for Desktop and follow the next steps:
Find “Toolchain Manager” in the list and press “Install”
Open the “Toolchain Manager”
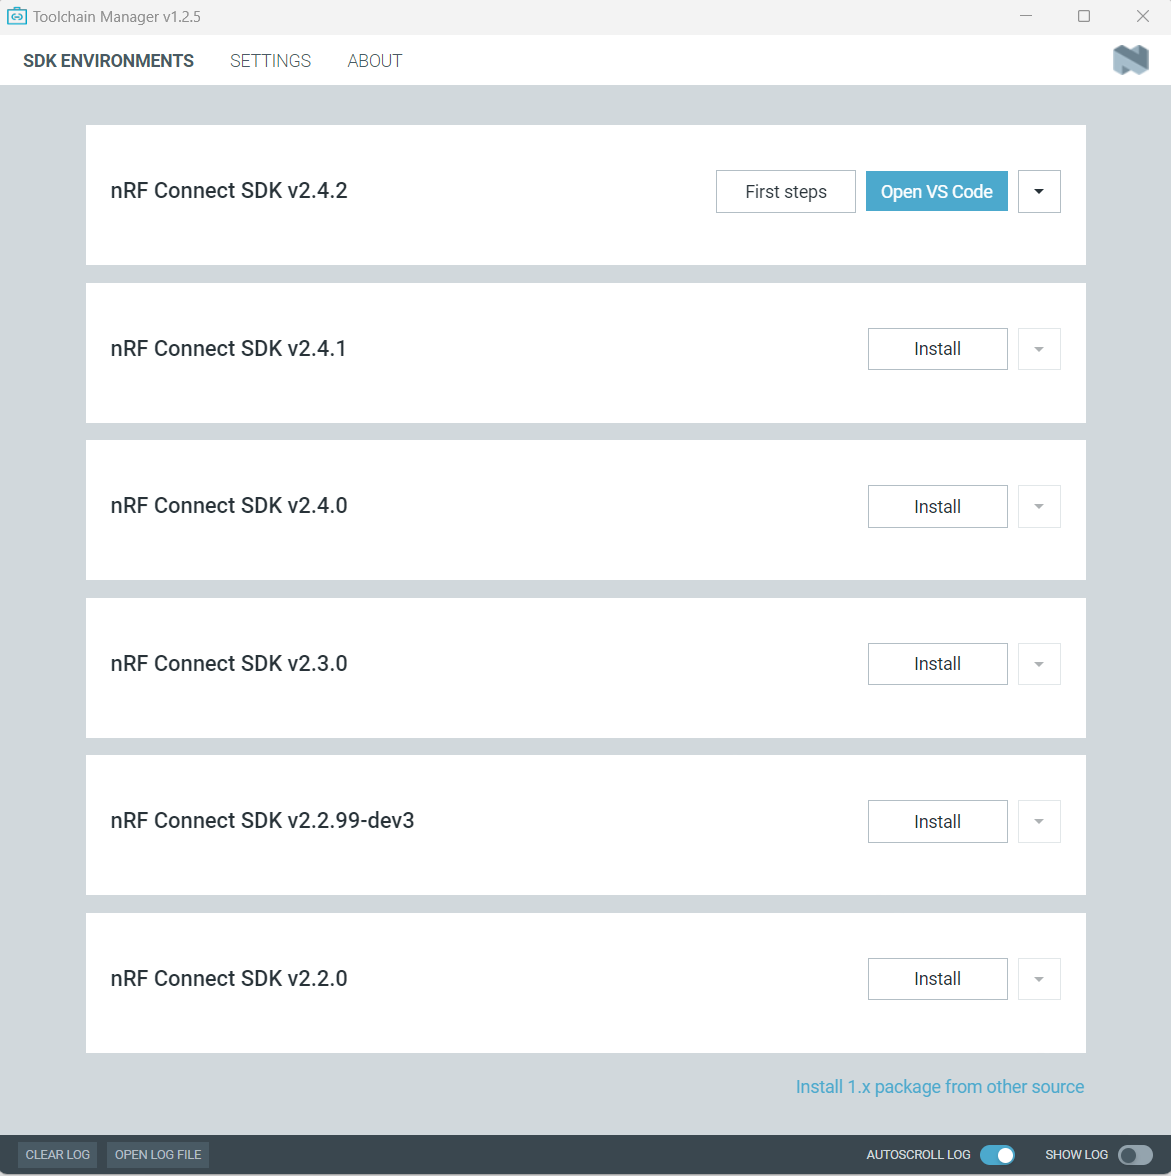
Download the newest version of “nRF Connect SDK” that is available.
After the installation of the nRF Connect SDK, press “Open VS Code” as shown in the figure below. This will check for the required extensions/dependencies, if any is missing press “Install missing extensions”, and then press “Open VS Code” again.
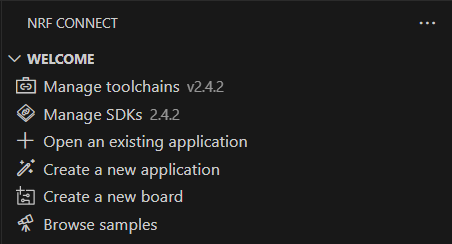
When VS Code has opened, go to the nRF Connect extension. This can be found in the menu on the left side.

The nRF Connect extension#
Check that the active toolchain and nRF Connect SDK is the same version that was downloaded in the Toolchain Manager. If not, press “Manage Toolchains”/”Manage SDKs” and then “Set Active Toolchain”/”Set Active SDK”, and choose the correct version.
Build and programming#
Press “Open existing application” in the nRF Connect extension. Navigate to the folder downloaded earlier. Go to the “examples” folder and open an example project folder. For simple evaluation choose the “zephyr_app_ux folder.
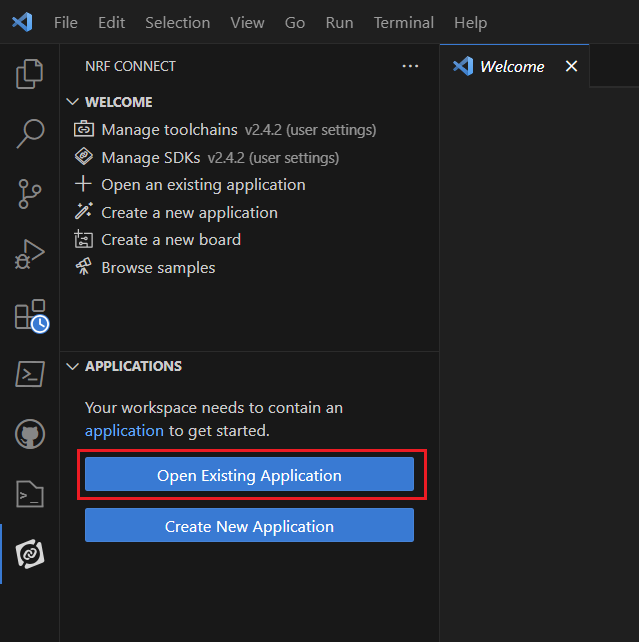
After opening the project VSCode might jump back to the file explorer, so make sure to return to the nRF Connect extension before continuing.
Before the project can be built, a build configuration has to be created:
Press “+ Create new build configuration” in the menu on the left side under the “Applications” tab

Choose the correct board. Default is nRF52840dk.
For configuration choose prj.conf
For Device Tree Overlay, press “Add Overlay” and choose the correct overlay for the board that is being used. There are options for both the nRF52840dk board and the nRF52833dk board, and the name can be found on the front of the board.
For the NOVELDA examples, an extra CMake argument has to be added to decide which interface is being used.
For I2C:
-- -DUSE_HW_INTERFACE=0For SPI:
-- -DUSE_HW_INTERFACE=1
Give the build directory a name.
Keep “Optimization Level” on the default
Now the build configuration should look like this:
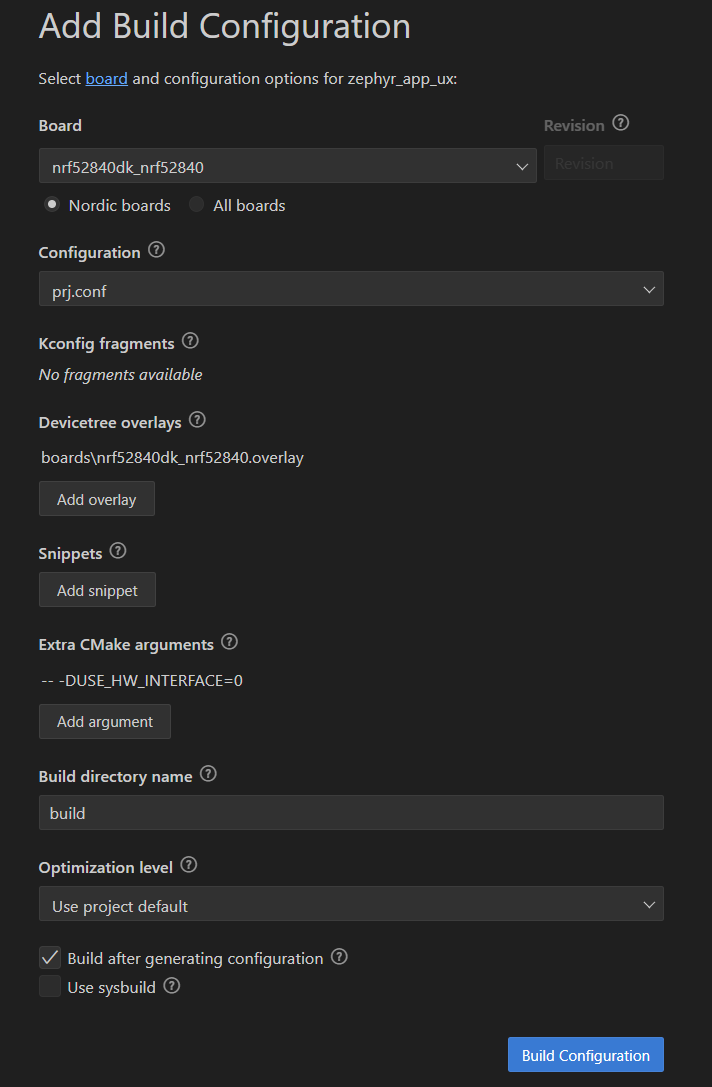
Press “Build Configuration”. This will automatically start the build process as well, unless the “Build after generating the configuration” box is unchecked.
Note
The build process should be displayed in a terminal on the bottom of the page. If the terminal does not open automatically, press “Terminal” in the top menu, and then “New Terminal”, and select the running build terminal from the terminal menu on the right side.
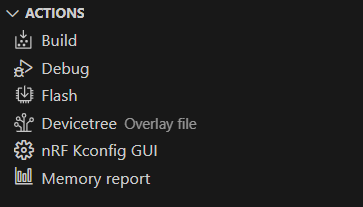
To build the project after doing changes to the code, use the pristine build button or the build button under the “Actions” tab.
Under the “Actions” tab there is also a “Flash” button that is used to flash the built project to the connected board. When the mouse is positioned over the “Flash” button, a small symbol appear on the right side of the line. This is called “Erase and Flash to Board”. It is recommended to use this to be sure that any old firmware does not interfere with the new one.
Note
Make sure that the Nordic board is turned ON. The “nRF Power Source” button should be at “VDD”, and the “nRF Only Switch” should be at “Default”.
Make sure that the NOVELDA X4F103 Shield is connected correctly to the Nordic board. Pin-out for the shield can be found here: X4F103 Shield brief
When the X4F103 SDK example project is build and flashed to the Nordic board, follow the next steps to see the output.
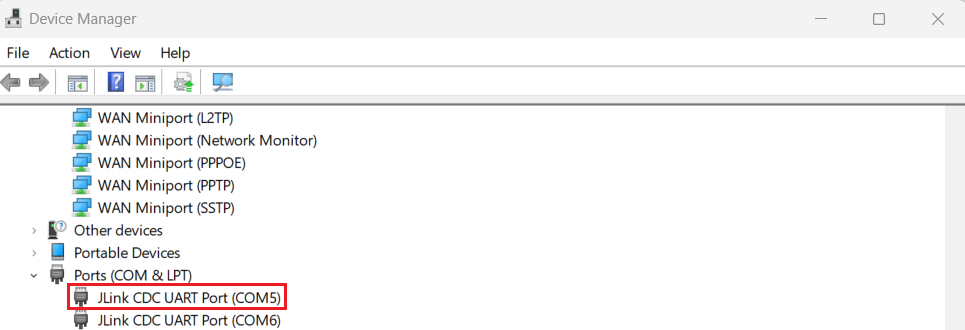
Open Device Manager to find which COM port the Nordic board is connected to.
Note
The device name should start with “JLink”. If two ports are listed (like the figure above), use the bottom one.
Open a serial reader (like PuTTY) with the COM-port and serial speed 115200.
If the output is not printed in the terminal immediately please press the “IF BOOT/RESET” button on the Nordic board.
Debugging#
If some error is occuring during the first build, try restarting the computer. There might be some installations or changes that need a restart.
If flashing via VS Code does not work, there are a couple of options.
First check that VS Code detects the board. It will list all connected boards under the “Connected Devices” tab at bottom of the left menu. If it does not show up here, check that the board is turned on, and try to press the refresh button that shows up next to “Connected Devices” when the mouse is positioned over the section.

An alternative way to flash the board is to open the project folder in PowerShell and use the following command (change name of the build folder if it was called something else):
nrfjprog -f NRF52 --program build\zephyr\zephyr.hex --chiperase --verify --log.